



A Windows 11 PC that keeps disconnecting from Wi-Fi can be very frustrating. You may be working, streaming, gaming or even in a video meeting where the Wi-Fi drops every few minutes or Wi-Fi works fine for a while and then drops.
Good news frequent Wi-Fi disconnections don’t necessarily mean that your wireless adapter or router is dying. There are several causes of Wi-Fi issues on Windows 11, ranging from outdated drivers to Windows’ network configuration, Wi-Fi interference, power-saving, router issues, incorrect network configuration and even problems with your ISP.
Microsoft recommends checking basic network diagnostics first and then progressing towards more involved solutions such as resetting network components, reinstalling the wireless adapter driver, adjusting power-management settings and using Windows 11’s Network Reset as a last resort.
In this guide, you’ll learn how to troubleshoot Windows 11 Wi-Fi keeps disconnecting problems step by step without immediately resorting to a Windows reinstall.
Table of Contents
Why Does Windows 11 Wi-Fi Keep Disconnecting?
There isn’t one clear reason why Windows 11 Wi-Fi keeps disconnecting. Some of the most common causes of Wi-Fi disconnections include:
- Outdated or corrupted Wi-Fi drivers
- Wi-Fi adapter power saving
- Weak wireless signal
- Router problem
- Wireless interference
- Problems with 2.4 GHz or 5 GHz band
- Incorrect TCP/IP configuration
- DNS problems
- Recent Windows updates
- Router firmware
- Network adapter configuration problems
- VPN or other networking software
- Hardware problem with the wireless adapter
The first thing to determine is whether the problem is affecting just your Windows 11 PC or every device connected to the same Wi-Fi network.
If your phone, tablet or another PC stays connected while your Windows 11 PC keeps dropping, it’s more likely to be an issue with the PC. If multiple devices drop at the same time, your router, modem, ISP or wireless environment may be the culprit.
1. Check Whether the Problem Is Your PC or Wi-Fi Network
Before you start changing Windows 11 settings do a simple test. Connect another device (a phone, another PC etc.) to the same Wi-Fi. Keep it connected for a while and see whether it also keeps dropping.
If only your Windows 11 PC disconnects
The problem is likely related to:
- Wi-Fi adapter
- Driver
- Windows configuration
- Power management
- Signal reception on that particular device
If multiple devices are dropping
The problem may be related to:
- Router
- Modem
- ISP
- Wireless interference
- Router firmware
- Internet service outage
Microsoft also recommends testing the same Wi-Fi network on another device to determine whether the source of the problem is the Windows device or network.
This simple test can save you a lot of unnecessary troubleshooting.
2. Restart Your Router and Modem
It sounds basic but restarting the networking equipment can resolve temporary connectivity problems.
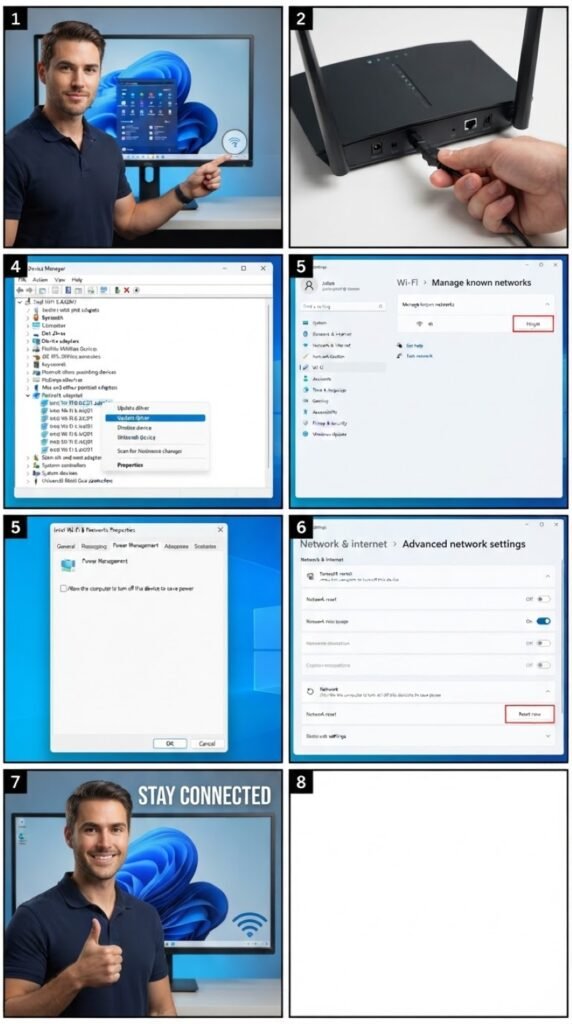
Turn off your modem and router.
If they are separate devices:
- Unplug the modem.
- Unplug the router.
- Wait around 30 seconds.
- Power the modem back on.
- Wait for it to reconnect.
- Power the router back on.
- Wait several minutes.
- Reconnect your Windows 11 PC.
If you use a modem/router combination device, you generally only need to restart that single device.
Microsoft recommends restarting the modem and wireless router as an early troubleshooting step because it can establish a fresh connection to the ISP.
3. Run Windows 11 Network Troubleshooter
Windows 11 has built-in network troubleshooters. Microsoft currently recommends using the automatic Network and Internet troubleshooter in Get Help to diagnose common connectivity problems.
Try this:
- Open Start.
- Search for Get Help.
- Open the application.
- Search for network and internet troubleshooter or connect to network and internet.
- Follow the diagnostic instructions.
- allow Windows to apply recommended fixes when available.
The troubleshooter may find problems with network configuration or connectivity. It’s a good first step since it requires relatively little technical knowledge.
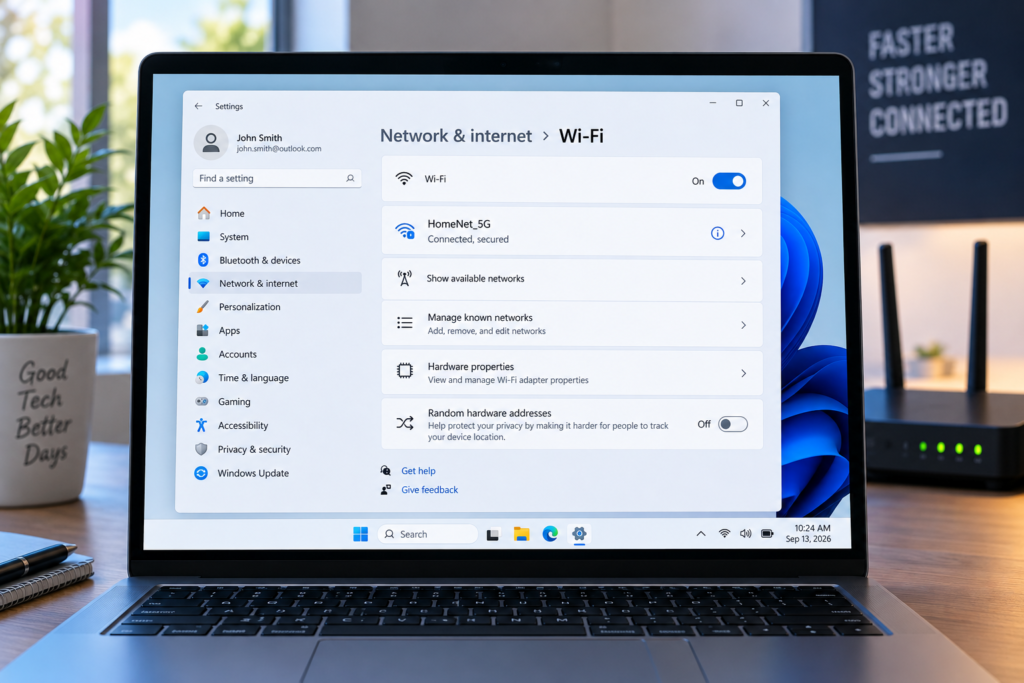
4. Forget the Wi-Fi Network and Reconnect
Sometimes the saved Wi-Fi profile becomes problematic. Windows stores information about wireless networks, including authentication and connection details. Removing the saved profile and reconnecting can help in some cases.
How to forget the network
- Go to:
- Settings > Network & internet > Wi-Fi > Manage known networks
- Find your Wi-Fi network and select Forget.
- Then return to the available Wi-Fi networks, select your network and enter the password again.
Microsoft specifically recommends forgetting and reconnecting to the Wi-Fi network as part of its general Windows connectivity troubleshooting process.
5. Check Your Wi-Fi Signal Strength
If your PC is far away from the router try moving it closer for now. Walls, floors, large appliances, metal objects and the layout of your home can all interfere with wireless performance. Microsoft notes that home layout is an often over looked factor in Wi-Fi performance.
Try this test
- Move your PC closer to the router and keep it connected. If the disconnecting problem goes away, the issue may be related to wireless signal strength rather than Windows.
- For a permanent solution, you could consider repositioning the router, improving its placement or using an appropriate mesh or access-point solution.
6. Try a Different Wi-Fi Frequency Band
Modern routers typically provide multiple wireless frequency bands, namely 2.4 GHz and 5 GHz. Newer equipment may also support 6 GHz. Microsoft recommends trying a different frequency band when troubleshooting Wi-Fi connectivity problems. For example, if your Windows 11 PC is currently connected to 5 GHz and keeps dropping, try the 2.4 GHz network if it’s available. The reverse can also be useful.
Why this can help
The 2.4 GHz band generally travels farther and can work better through obstacles, while 5 GHz can offer higher performance at shorter distances. Therefore, the best band depends on the router, adapter, distance, interference and your actual physical environment.
7. Disable Wi-Fi Adapter Power Saving
A particularly helpful step is to check the power-management settings for your wireless adapter. Windows may use power-saving features to save energy and in some situations this can contribute to connectivity problems. Microsoft recommends checking the Wi-Fi adapter’s Power Management settings and disabling the option that allows Windows to turn off the adapter to save power.
How to check it
- Right-click Start.
- Open Device Manager.
- Expand Network adapters.
- Find your wireless adapter.
- Right-click it.
- Select Properties.
- Open the Power Management tab.
- Look for:
Allow the computer to turn off this device to save power
- If the option is enabled, uncheck it.
- Click OK and restart your computer.
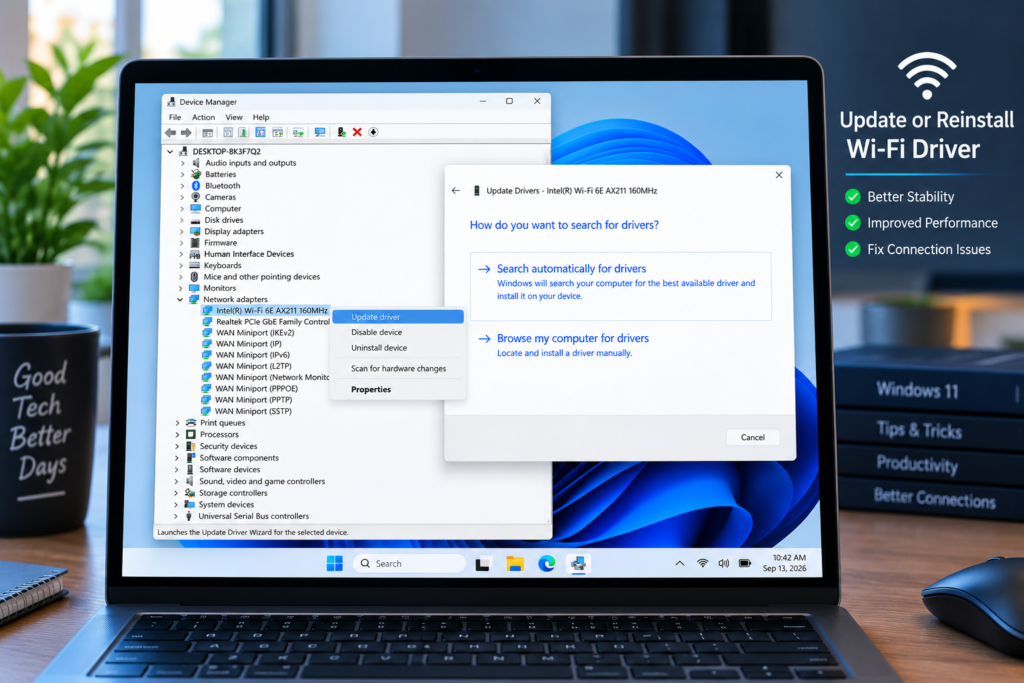
8. Update Your Wi-Fi Driver
An outdated, incompatible or corrupted wireless driver can lead to intermittent connection problems.
Start by checking Windows Update:
Settings > Windows Update > Check for updates
Microsoft recommends installing available Windows updates when troubleshooting connectivity issues.
You should also check your PC manufacturer’s support website for the latest Wi-Fi driver for your specific model. For example, if you’re using an Acer, Dell, HP, Lenovo, ASUS or another manufacturer’s PC, use the manufacturer’s support page and search by the exact model.
Important
Don’t randomly download a Wi-Fi driver from an unknown third-party website.
Use the PC manufacturer’s website or wireless adapter manufacturer’s official support resources when possible.
9. Reinstall the Wi-Fi Adapter Driver
If updating the driver doesn’t solve the problem, reinstalling it can sometimes help. Before doing this ensure you have access to the correct driver. If your PC can’t connect to the internet after the driver is removed, you may need to use another computer to download the driver and transfer it using a USB drive.
Microsoft recommends having a driver available as a backup before uninstalling the network adapter.
Steps
- Open Device Manager.
- Expand Network adapters.
- Locate your Wi-Fi adapter.
- Right-click it.
- Select Uninstall device.
- If offered, select the option to attempt to remove the driver.
- Confirm the uninstall.
- Restart the PC.
After restarting, Windows may automatically reinstall the network adapter driver.
If it doesn’t, install the driver you downloaded from the manufacturer’s official website.
10. Reset TCP/IP and DNS Using Command Prompt
If the Wi-Fi connection keeps dropping, resetting Windows networking components can help.
- Open Command Prompt as Administrator
- Run the following commands one at a time:
- netsh winsock reset
- Then:
- netsh int ip reset
- Then:
- ipconfig /release
- Then:
- ipconfig /renew
- Finally:
- ipconfig /flushdns
Microsoft lists these commands as a troubleshooting method for resetting the TCP/IP stack, renewing the IP address and clearing the DNS resolver cache.
After running them, restart your PC and test the Wi-Fi connection.
11. Check Your Router’s Wireless Channel
Wireless interference can also lead to unstable connections. If many nearby routers are using the same wireless channels, your connection may experience interference. Microsoft recommends considering a different wireless channel when Wi-Fi drops frequently. You generally change the channel through your router’s administration interface. The exact steps depend on the router manufacturer, so check your router’s documentation before changing advanced wireless settings. If you’re not comfortable with changing router settings, leave the configuration alone and consider first trying another Wi-Fi band or repositioning the router.
12. Check for Windows Updates
If your Wi-Fi problem started after a Windows update, the update or a driver interaction may be relevant. First, check whether additional updates are available:
Settings > Windows Update > Check for updates
Install pending updates and restart the PC. If the problem clearly began immediately after a particular update, Windows also provides recovery options that can sometimes help with update-related problems. Microsoft documents options such as uninstalling a recent update when appropriate.
However, don’t uninstall updates simply because you experience a Wi-Fi problem. First, determine whether the update is actually connected to the issue.
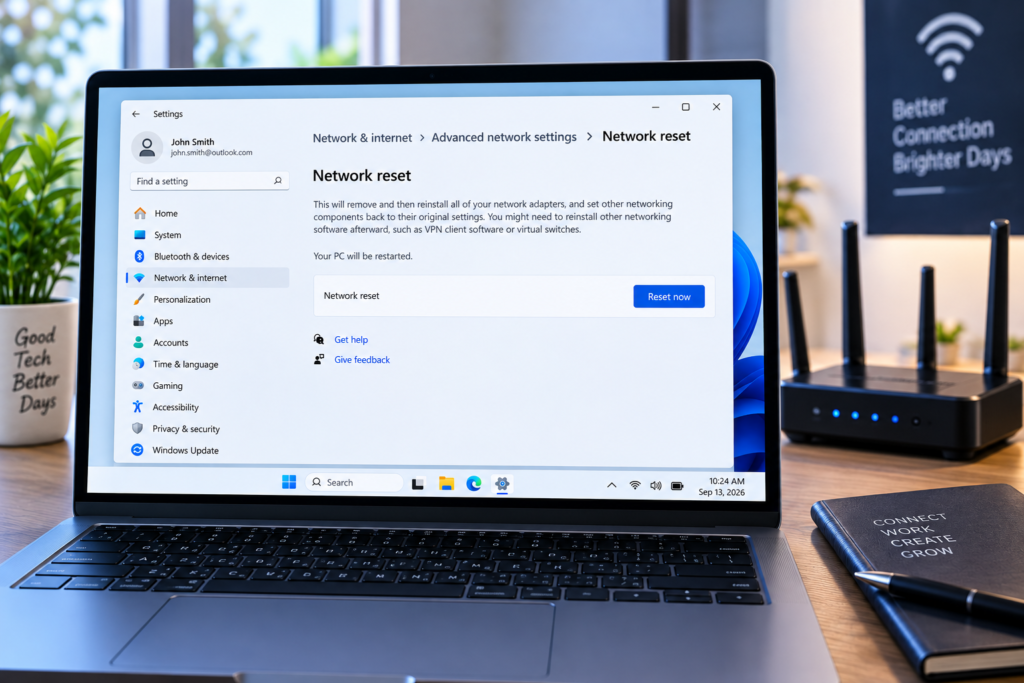
13. Use Network Reset as a Last Resort
If you’ve tried the other solutions and Windows 11 still keeps disconnecting, Network Reset is an option. Microsoft specifically recommends using Network Reset as a last troubleshooting step.
Windows 11 steps
Go to:
Settings > Network & internet > Advanced network settings > Network reset
Select:
Reset now
Windows will restart the computer and reinstall network adapters while returning network settings to their defaults.
Important warning
Network Reset can remove network adapter configurations. You may need to reconfigure:
- Wi-Fi connections
- VPN software
- Virtual switches
- Other networking software
Microsoft specifically warns that VPN clients and Hyper-V virtual switches may need to be set up again after a network reset.
That’s why this shouldn’t be your first solution.
What If Wi-Fi Disconnects Only When the PC Sleeps?
If Wi-Fi problems seem to happen primarily after the computer wakes from sleep, power-management settings are especially worth checking.
Start with the Wi-Fi adapter’s Power Management settings in Device Manager and consider disabling the option allowing Windows to turn off the adapter to save power.
Also install the latest chipset, wireless and Windows updates for your computer.
If the problem persists after that, check your PC manufacturer’s support documentation for model-specific sleep and network-driver issues.
What If Wi-Fi Works on My Phone but Not My PC?
This is actually useful information.
If your smartphone stays connected to the same Wi-Fi network while the Windows 11 computer keeps dropping, the router and internet connection may be working fine.
Focus your troubleshooting on:
- Wi-Fi driver
- Windows network configuration
- power management
- Wi-Fi frequency band
- wireless adapter hardware
- Windows updates
Microsoft recommends using another device on the same network as a diagnostic comparison.
What If Every Device Keeps Disconnecting?
If your phone, laptop, smart TV and other devices all lose Wi-Fi at the same time, don’t immediately start changing Windows settings.
Instead, investigate:
- Router
- Modem
- ISP connection
- Router firmware
- Wireless interference
- Router overheating
- Network congestion
If an Ethernet-connected device also loses internet access when the Wi-Fi devices disconnect, the problem is more likely to be upstream of Wi-Fi itself. Contacting your ISP may be appropriate if the problem persists across multiple devices.

2 Comments
Pingback: How to Fix Windows 11 High CPU Usage: 12 Proven Solutions
Pingback: USB Device Not Showing in Windows 11? 12 Proven Fixes